
Welcome to part 1 of a multiple part course on passing your AWS Architect & Developer Associate exams. The best part…this course is totally free of charge!
In this article we will look at Identity Access Management (IAM for short). IAM is AWS’s user management and user access facility and is guaranteed to appear in the associate exams.
The article will take just 15 minutes to read and I’ve included a few realistic exam questions around IAM scenarios at the end of the article as a bonus.
IAM topics to know for the AWS Architect & Developer Exams:
- IAM Roles
- IAM Groups
- IAM Policies
- IAM Users
- Enabling Multi Factor Authentication
- IAM Root User Best Practices
- Adding a new User
- Enabling Password Rotation
- Creating new Roles
After reading this post you will have sufficient knowledge of Identity Access Management (IAM) to pass both the Architect Associate and Developer Associate exams.
Seriously, take the time to read the entire article. It will help massively when taking the real exam
What is Identity and Access Management (IAM) ?
IAM is a pretty simplistic concept.
If you’ve worked with user management, authentication & permissions on virtually any other enterprise software solution then congratulations, you’ll already have the basics of AWS IAM.
AWS Identity and Access Management (IAM) basically just a way of securing control and permissions for AWS resources. Through IAM you can create & manage users and assign access rights to this users for specific resources.
A brand new AWS account will be set up initially with a single user. That user has unrestricted root level permissions to provision resources. This user is known as the root user and is a special case that needs to be handled differently to the rest of the AWS user accounts. We cover these best practices in the Root User best practices section later in the article
AWS IAM permissions are broken down into categories of Users, Group, Role and Policy so let’s take a look at what each of these mean in the next section.
So what are IAMs features?
- Allows access to the same AWS account for multiple users
- Temporary Access for users
- Low level permissions can be assigned on a per user basis
- Strong integration with AWS services
- OAUTH authentication allow for Facebook, LinkedIn, Microsoft Active directory sign in
- Multi Factor Authentication
- Password strength and rotation policies out of the box
What is an IAM USER?
A user is well.. A user!
If you want access to an AWS account then you’ll have to have a User account. The Root user is created by default and from there on they can create more users.
When you log in to AWS using your user credentials you’ll be present with your own management console specific to you.
What is an IAM ROLE?
Ok so the best way to think of a Role is as a way of allowing AWS users to access a specific resource such as an EC2 instance without the need to pass around long term access keys.
Confused?
Here’s an example:
Situation: User Jeff wants to an EC2 instance. He needs only read permissions for this.
Solution: The AWS account admin can create a Role that allows Jeff to access a specific EC2 instance with Read only permissions. The privilege will only apply to him.
Why would we do this? Imagine Jeff is working in a police department and has the responsibility to look up licence plates for suspects. This role is specific to Jeff, the rest of his department should not have access.
You can only assign an IAM role to a user and not a group at this time.
Exam tip
Role questions are an exam favourite. You’re likely to see questions around IAM roles when you take the exam.
What is an IAM GROUP?
Put simply it’s a group of users.
The same user can be part of several groups and users can be added or removed from a group. However a group can not be put into another group.
The groups themselves can be granted things like access control policies and make it easier to apply those policies to many users at once. Examples of this would include things like creating a Group policy for a development team so that they all had access to the CodeCommit service in order to download source code.
What is an IAM POLICY?
Up until now we’ve defined users, groups and roles. However it’s the policy documents that define what the users and groups of users can actually do.
By default a new user will have no permissions associated with them. Therefore another user with sufficient privileges must grant permissions to these users.
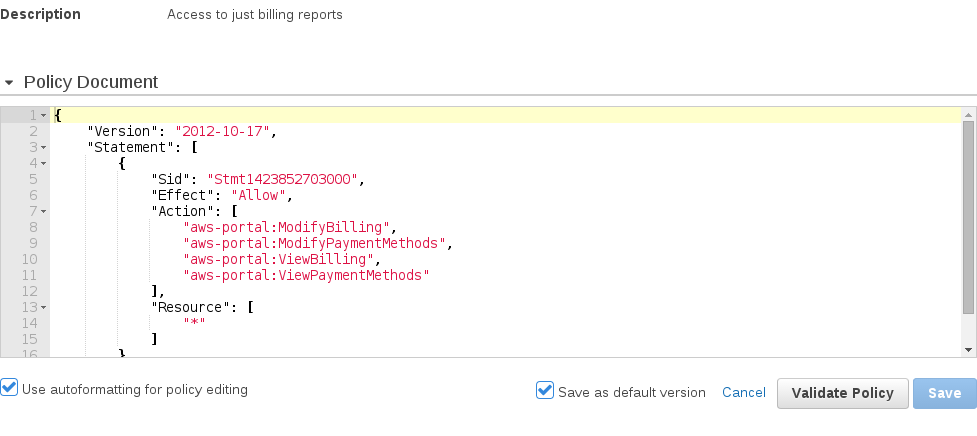
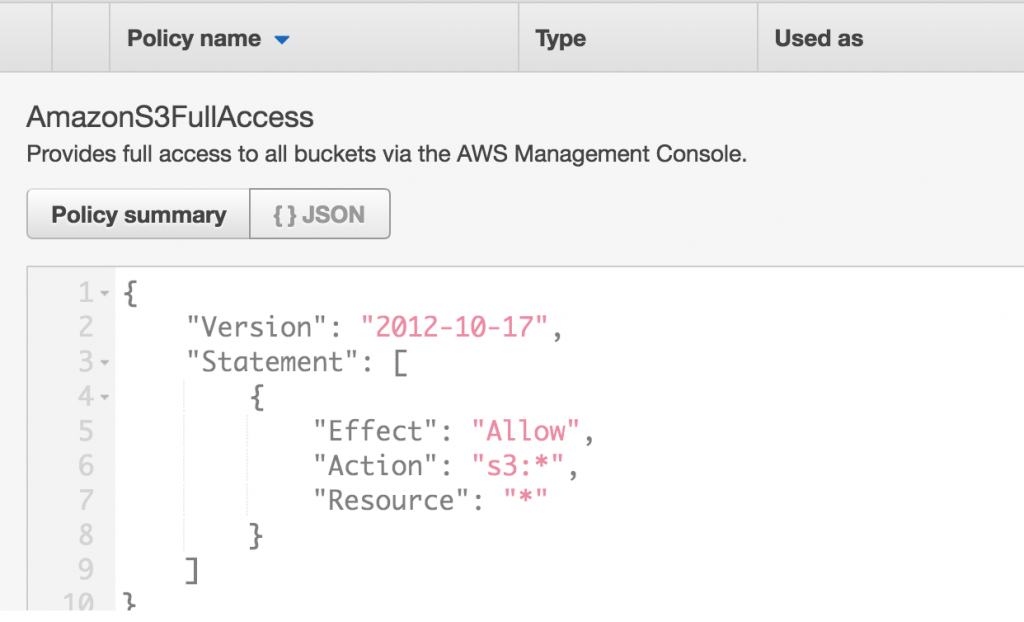
Policies are defined in JSON and describe what access is allowed for a specific service. Here’s an example of a policy document:
That’s the basic rundown of what a User, Group, Role and Policy are in AWS. Don’t worry if this feels like a lot to process. We’ll go into real world examples of each concept and it will start to make more sense.
Root user best practices
The root AWS account root user is created when you sign in via your email address and password when creating your AWS account.
This user has unrestricted access throughout your account. So for instance they could create a bunch of EC2 instances and wrack up a giant bill if unmonitored. With this danger in mind, it’s obvious to say that you don’t want to be giving out root access to everybody!
The AWS best practice advises you to use the root account to create your first IAM user (usually an administrator account) and then securely lock away the root user credentials for use only when absolutely necessary.
Exam tip
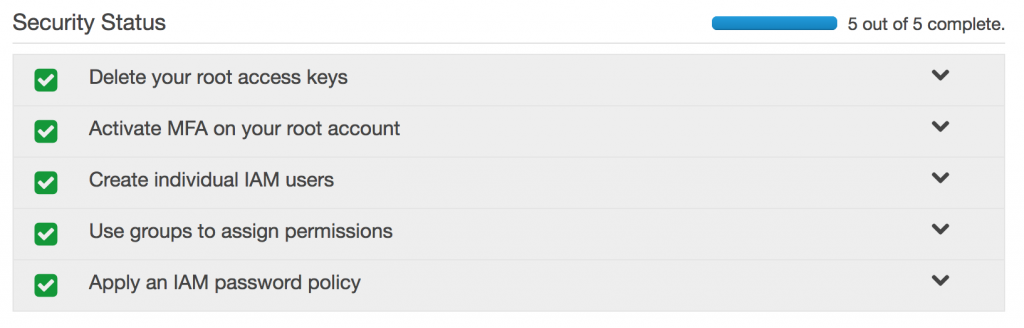
It’s also worth noting that the root users access keys is the first of 5 security recommendations
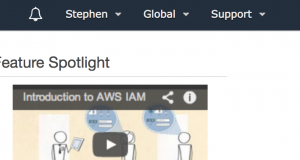
IAM is non Region specific
This is something that could pop up on the exam. Possibly as a trick or slightly misleading question. But put simply IAM is non region specific. Meaning that on the Management console you’ll see a ‘Global’ region when you enter the IAM service.
Therefore any changes or users you create will effect all regions.
Enabling Multi Factor Authentication
Multi Factor Authentication adds a second layer of protection around your traditional username and password. For every login attempt you will have to enter a unique 6 digit value.
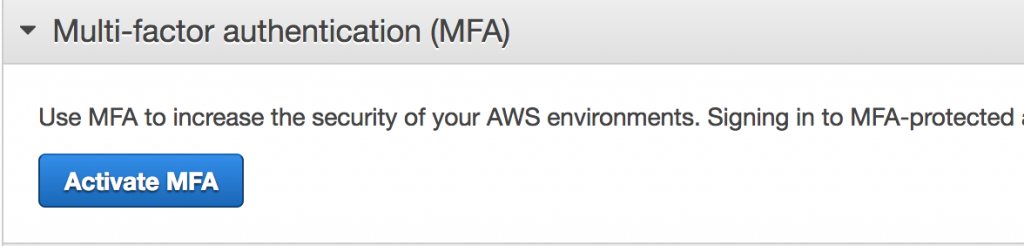
Enabling MFA is the second step of 5 steps that are highly encouraged to set up on your AWS account. To do so, simply click on the ‘Activate MFA on your root account’ drop down and click Activate MFA.
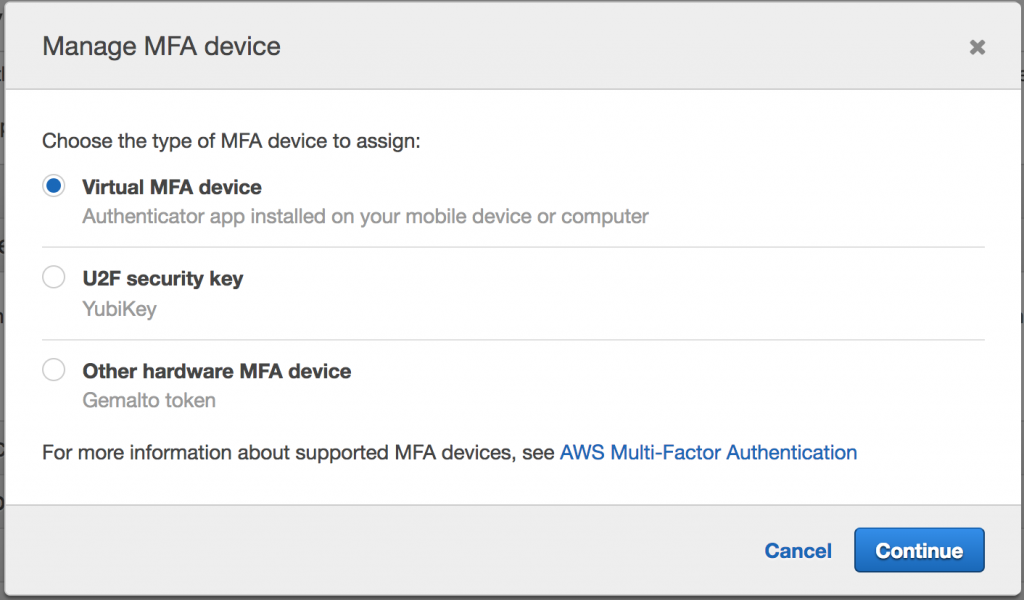
Next you’ll be presented with a dialogue box that asks you to select your MFA device. This is simply the device that will generate a unique code for you to enter each time you sign in. Select Virtual MFA device and we’ll install Google Authenticator to your smartphone.
What is Google Authenticator? – essentially it is the virtual MFA device that we will use generate unique 6 digit codes to enter when signing in.

Where can I get Google Authenticator? If you have an IOS device then head over to the app store and install it from there. If you have a Android device then visit the Play store and it will be installable from there.
Ok we’re almost there now. The next step is to link you now installed Google Authenticator app with your AWS account.
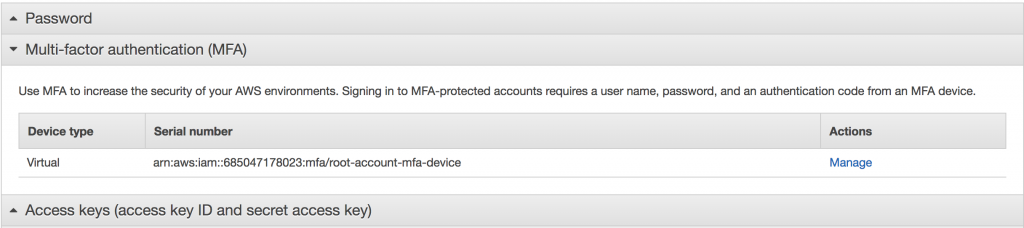
To do this we simply click the Manage button from the screenshot below.
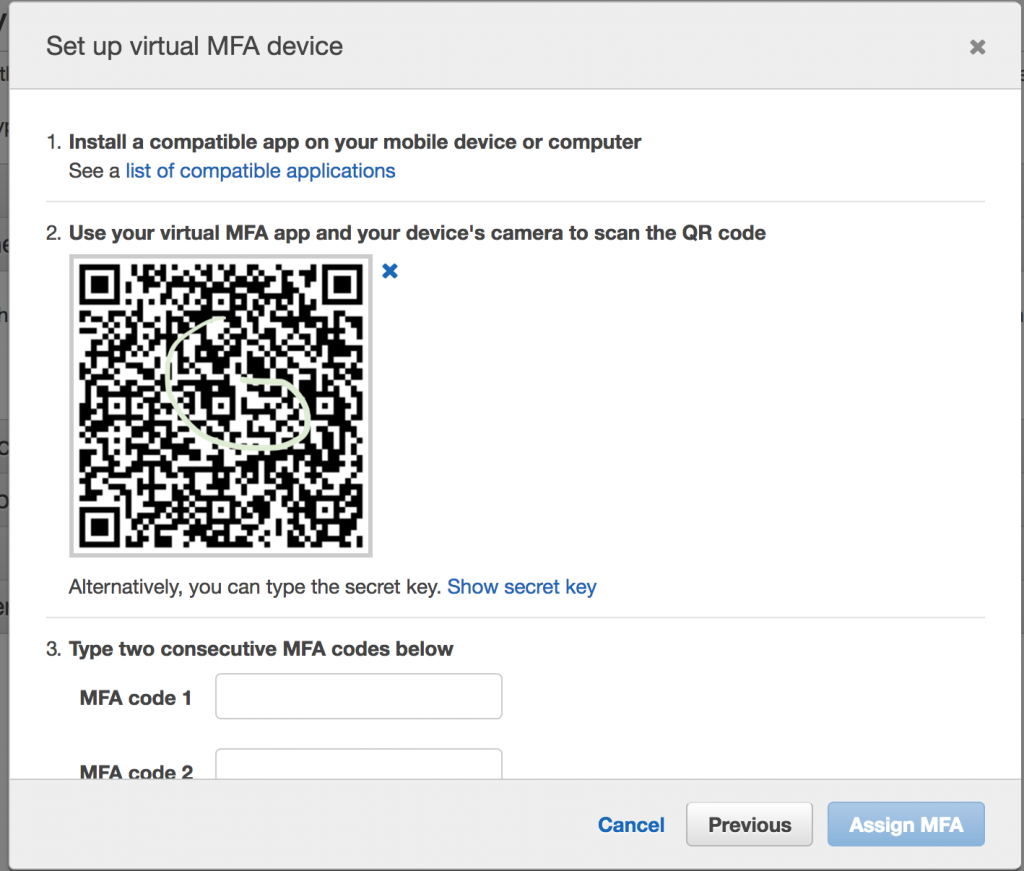
We are then asked to setup our virtual device. To do this, simply open up the Google Authenticator app and click scan QR code.
Then scan the QR code displayed on your computer screen.
Now for the final step and then you’re all paired up.
You’ll need to enter 2 consecutive 6 digit codes generated from your connected Google Authenticator app. This is the last step to confirm and pair your device. Simply add the 2 codes and click Assign MFA.
And that’s it! Hurray. You’ve successfully enabled Multi Factor Authentication on your AWS account. Now let’s move on to adding a new user in the next section.

Adding a new User
Adding a new user is part of the 5 steps, likely to appear in the exam and just plane useful for administering AWS in real life. So let’s take a look at how you would create a new AWS user.
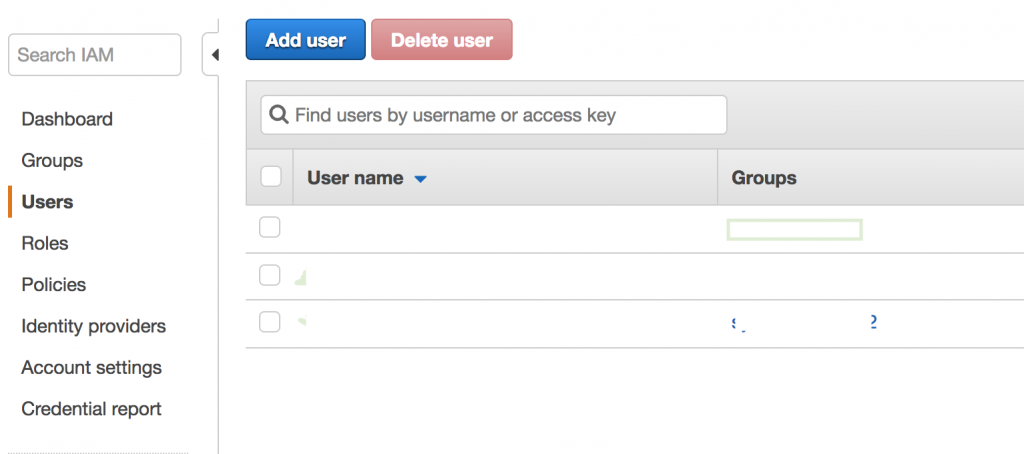
In the IAM management console click on the Users tab, show in the screenshot below and click the blue Add user button.
This screen will list all your users associated with this account and the groups they are associated with.
Adding a user is split into 4 steps.
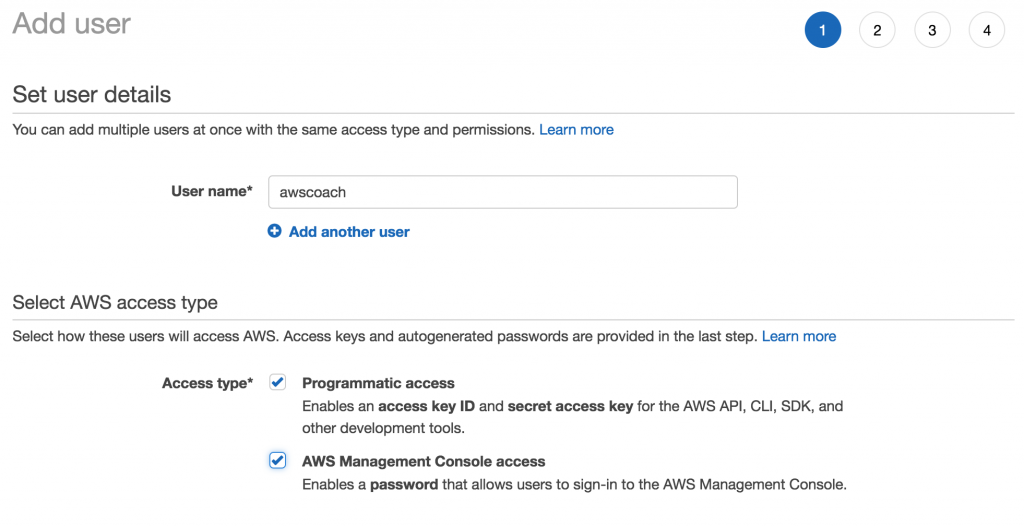
Step 1 is to set the user details. So we start by adding a user name. Note the “Add another user” option. They allows you to create multiple users in this same 4 step process. This can be handy if you need to create many users with similar roles in a short amount of time.
Like for instance if a couple of new starters have joined your development team.
The other option on this screen to note is the Select AWS access type section located below the user details.
Here you can choose how the user can access AWS. The two options are:
- Programmatic access is useful if you are for instance a developer who wants to interact with AWS via SDK’s or the CLI.
- AWS Management Console access however is more suited to those users who are interacting directly with AWS. Such as system admins. Typically you would enable both of those access types for a developer/architect.
Ok so that’s step one done. Now we can move onto step 2.
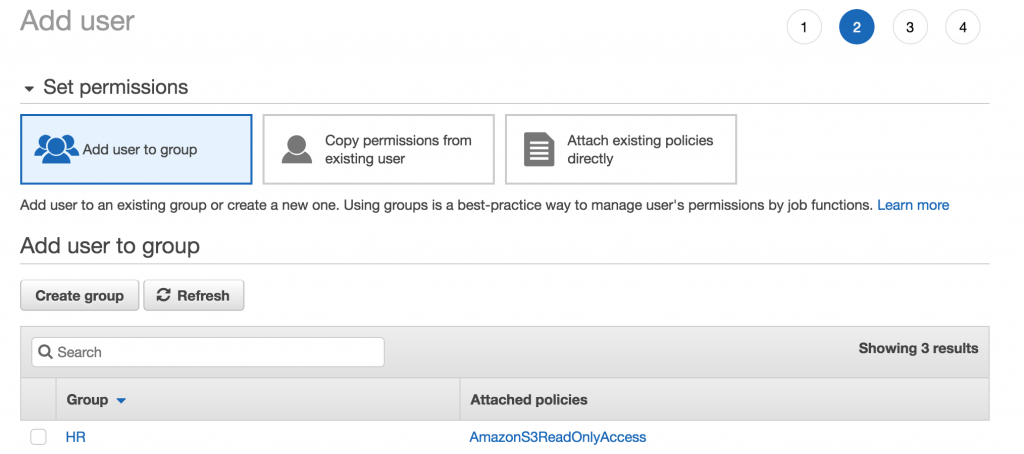
In step 2 we add the users we’ve just created to a groups. Remember what a group is? We covered it in the What is an IAM GROUP section earlier. There are 2 other options:
Copy permissions from existing users – which basically applies the same policies already set for another user to the user you’ve just created.
Attach existing policies directly – this is where instead of assigning a group of policies to a user, we pick out specific policies and assign them directly to that user.
In this case, we are just going to assign the user to a group, so you won’t have to worry about those options. But wait! We don’t have a group, what should we do?
Don’t worry we can create one during the user setup.
Click on Create group.
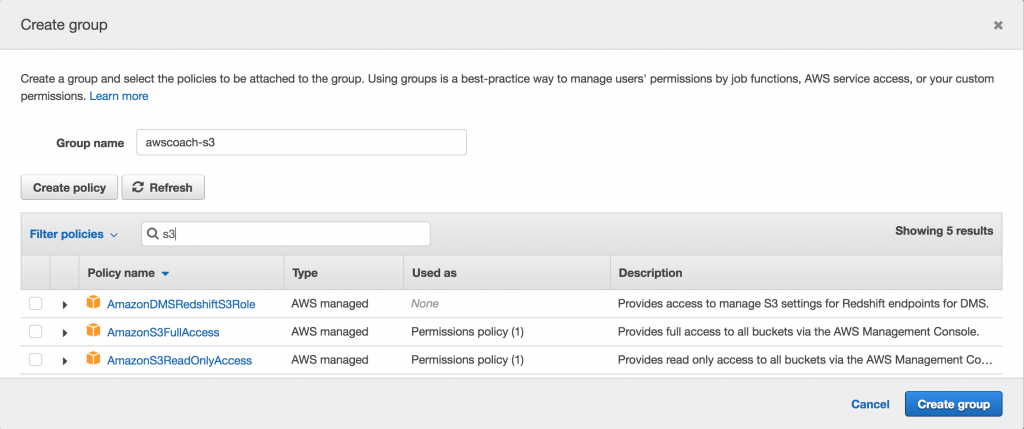
Let’s start by giving our group a name.
Next we need to decide what policies this group will contain. In order to make this realistic let’s say that our new user needs to access S3 for backing up the AWS Coach website. Therefore we have to give our user S3 access controls.
The list of preconfigured policies is really long so I’d recommend just using the search field and typing in S3.
From here we can see a smaller list of S3 related policies. Let’s select the checkbox next to S3FullAccess as our user will require it and click Create Group.
That’s it, you’ve created a group, that was pretty painless right?
As a side note, if you’re curious. I’ve included a screenshot of what a policy document looks like under the hood.
It’s basically a JSON document that defines what permissions this policy allows. The example below is of a policy document that allows full access to S3. See if you can follow it.
Ok let’s move onto step 3.
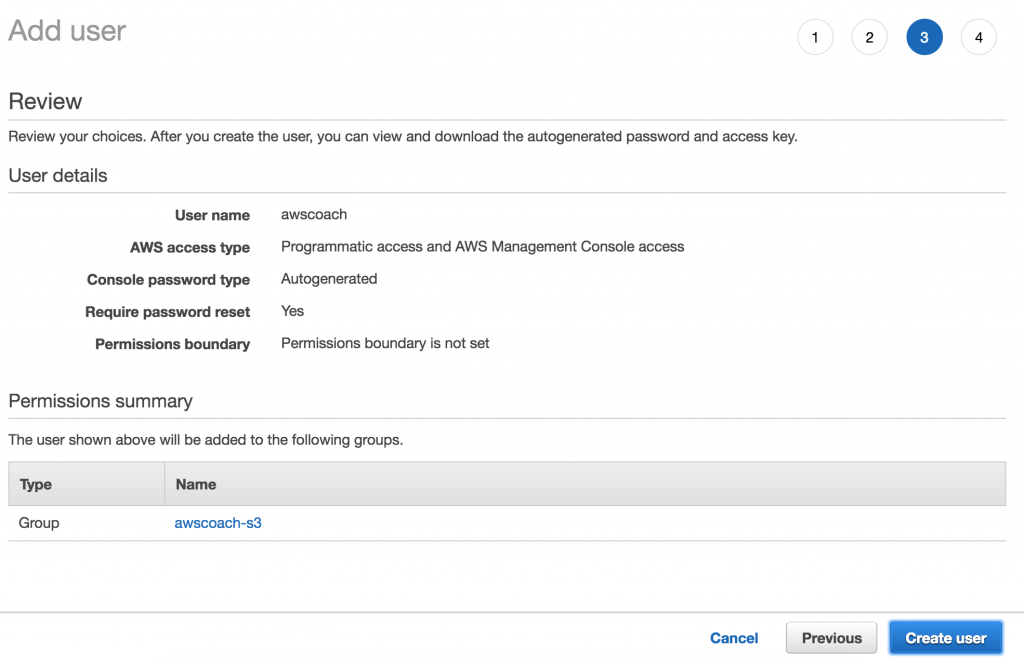
Step 3 is an easy one. It just involves reviewing the user you’ve just created! So let’s go ahead and click Create User.
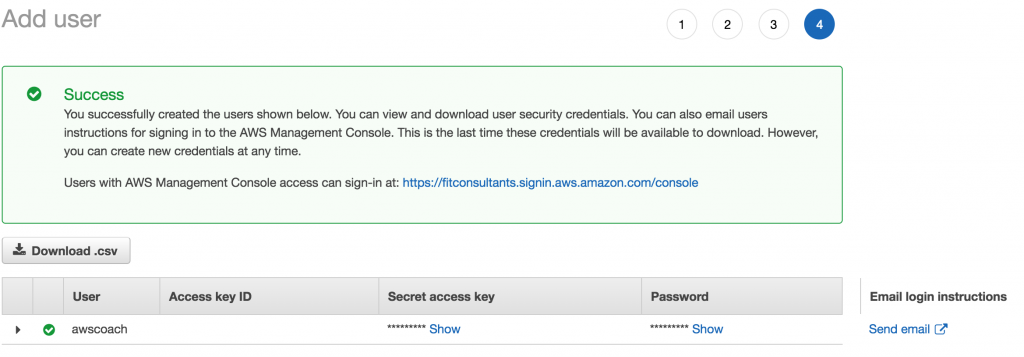
At this point you are presented with a lovely success message indicating our user AWSCoach has been created.
There is however one critical thing to take note of on this final screen.
This is the ONLY point where you can view a users Secret access key and Password unencrypted. After this point there is no way of retrieving these values. The only way to view keys and passwords would be to invalidate these ones and generate completely new ones.
Clicking on the Show button will reveal them.
Password Policy Management
This is the final of the 5 steps that IAM recommends. So by this point you’ve:
- Deleted your root access keys
- Activated MFA on your root account
- Created Individual IAM users
- Created User Groups and assigned permissions.
Now the last step is to apply an IAM password policy.
This part is fairly self explanatory. Essentially you are defining how strong and how often you want to rotate passwords for users. When you’re happy with your setting simply click Apply Password Policy and you’re done.

Creating and Assigning Roles
Creating roles is something that will pop up when we start to look into greater depth about EC2 but for now we’ll just skim over the basics of creating a role that can be assigned to AWS services as a later date.
On right IAM console click on the Roles section.
You’ll see a brief bullet pointed explanation of what roles can be used for. A little tip that I noticed is that in the exam you will most likely only see questions on second use case. That is Application code running on EC2 instances that need to perform actions on AWS resources.
So let’s click Create Role

Now we click AWS service as we want to associate this with an AWS service.
Followed by selecting EC2 from the services that will use this role section.
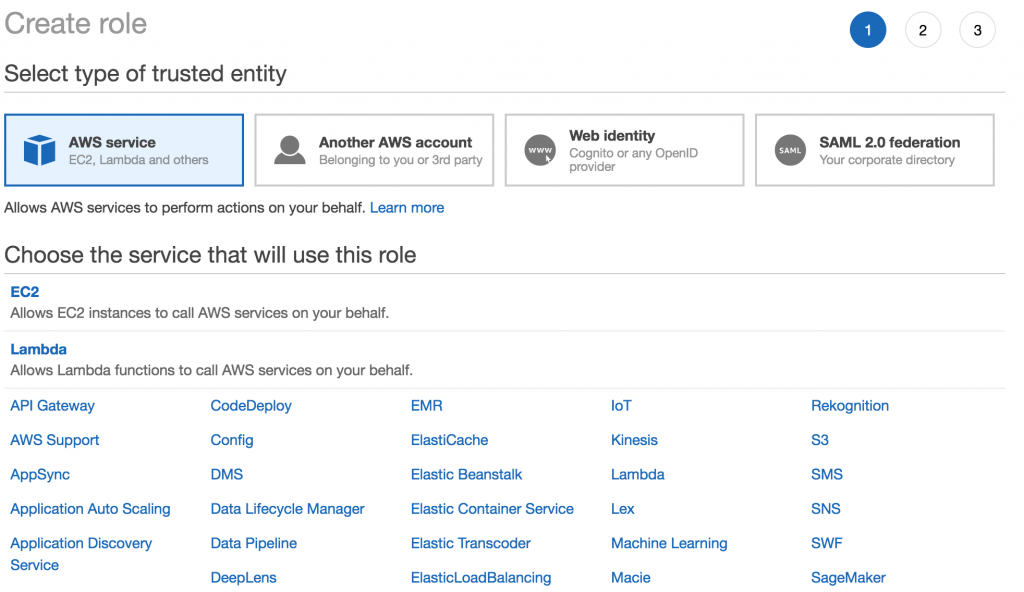
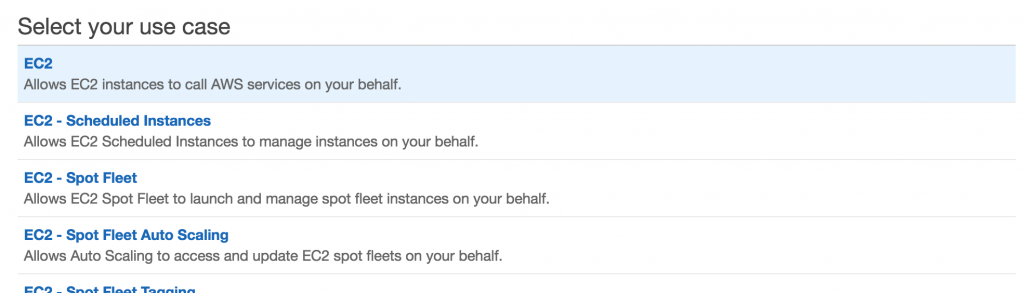
Afterwards we need to select the use case that applies to this role. For that will be the first option. Allows EC2 instances to call AWS service s on your behalf.
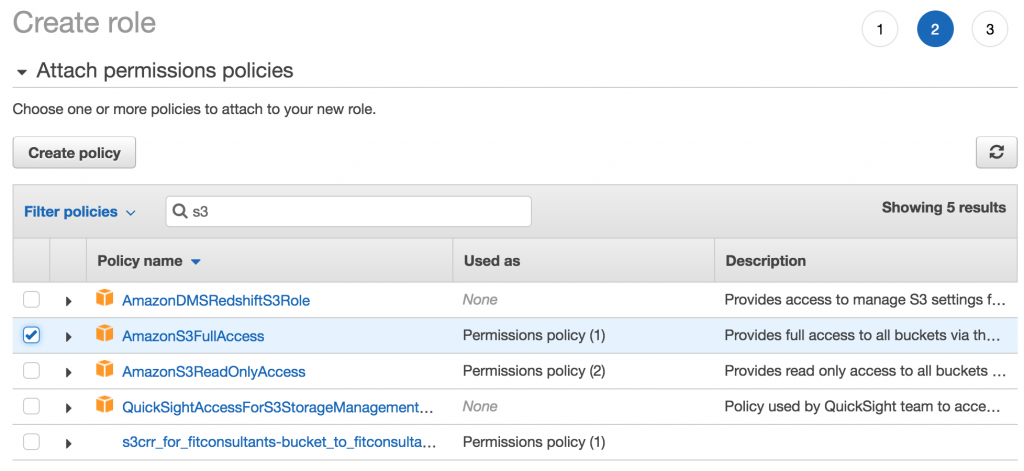
The next step works just like creating a group. We assign some policies to this role. As our role will need to access and perform operations on S3 buckets we give it S3 Full Access control.
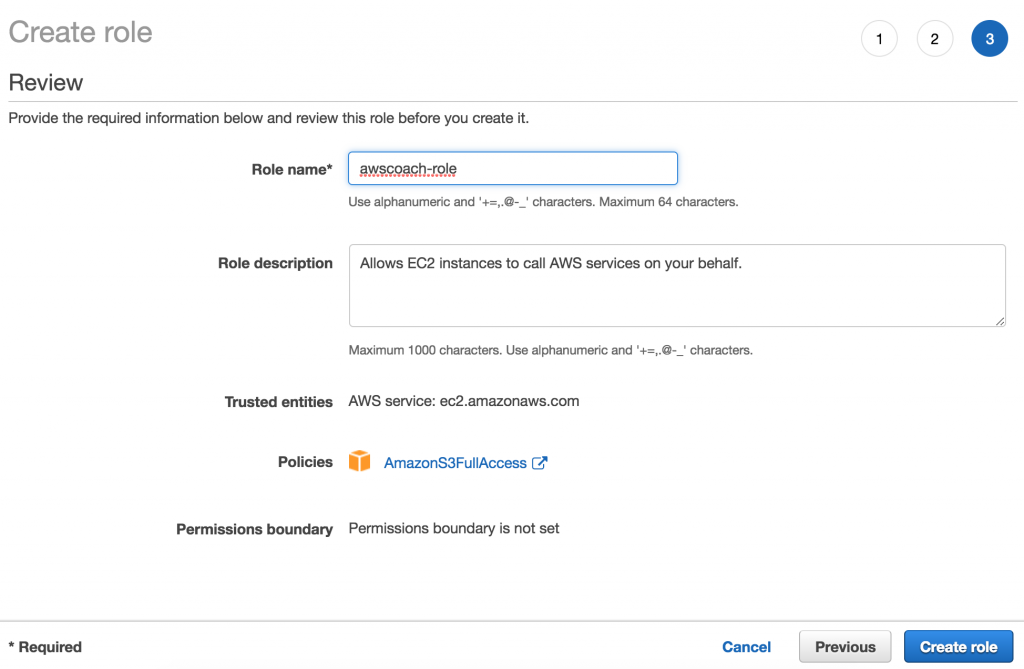
Alright! We’re at the review page. All you need to do now is click the Create Role button and we’re done!
What’s Next?
So now you know all about IAM in less than 15 minutes! 1 step closer to passing the architect associate exam.
In the next section we get to look at AWS’s domain management service Route53, another big topic on the Associate exams.
AWS Route53 – Associate Certification Guide & Exam Questions
Comments
Is there a certification just for ( IAM ) ?
Hi Madhavi, not that I’m aware of.