
Welcome to part 8 of a multiple part course on passing your AWS Architect, Developer & Sysops Associate exams. The best part…this course is totally free of charge!
Virtual Private Cloud or VPC for short plays a massive part in all of the AWS Associate certifications. If you want to stand a chance of passing any of them then you need to know this subject inside out. Therefore over the next few articles I’ll cover VPC in lots of detail and by the end you’ll have a strong understanding of the concepts around VPC and how to set one up from scratch.
What is Virtual Private Cloud (VPC)? Is basically a virtual data center that exists in the cloud. By using a virtual private cloud you can gain a lot more control over how your services are configured and managed.
The article will take just 15 minutes to read and after doing so you’ll have all you need to know to answer any basic question around VPC concepts in the AWS certifications.
Who should read this?
If you are studying for the:
- AWS Associate Architect
- AWS Associate Developer
- AWS Associate SysOps
Or you are using AWS and want to learn more about VPC then this is the article for you.
What is AWS VPC?

Virtual Private Cloud is basically a blank slate from which you can build your network architecture.
What do I mean by this?
Well VPC gives you the ability to section of an area of AWS create basically a virtual network. This means you can do things like select IP ranges for your VPC and other networking related activities such as setting up subnets, network gateways & configuring router tables.
You can do cool things with subnets, like allowing internet access for one subnet while restricting it for another. An example of where this might be userful is one subnet could could be used for API servers while another with no internet access could be used for running databases on.
This allows for greater control over the security of your AWS account. You can also setup network access control lists that prevent connections to your VPC subnets unless they match a specific IP range. Useful if you want to restrict access to your VPC.
Lastly (for the intro at least) I forgot to mention that you can allocate dedicated hardware for your VPC. However it is not cheap!
I come from a software development background, so learning about networking as part of the AWS certifications had a slightly steeper learning curve than say those coming from a DevOps background. But I found if you take your time with this section and learn the fundamentals then its no more difficult to pick up than any other part of the coursework.
What does a VPC look like?
Here’s one I prepared earlier:
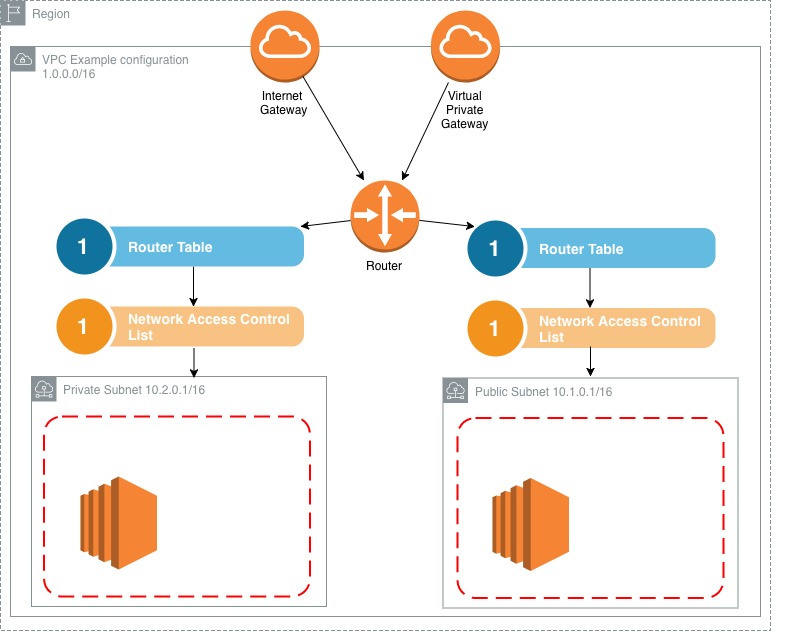
First off, don’t worry if you look at this diagram and think what on earth is all that!? I would have felt the exact same way priory to learning about VPC. Once we start breaking it down into its constituent chunks it becomes a lot less intimidating, trust me.
So what are we looking at?!
Let’s start with the easy parts. You’ll notice the entire thing is wrapped in a Region outline. This is because VPCs exist within regions. They are region specific. So everything that exists within a VPC is encapsulated within a chosen region. Easy enough, ok what’s next?

Next comes the actual VPC itself. You might notice an IP range attached to it. IP ranges were something I didn’t know a how bunch about. I’ll a quick rundown of how to read this later on in the article. But for now, all this means is there are 65000 IP address available for this VPC.
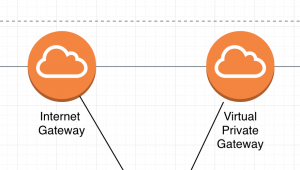
Next comes these funky looking icons. Basically they are the access points for your VPC. Usually there are only a few ways to access resources within the VPC. In this case you can connect via the internet gateway or a virtual private gateway. Ok let’s move on.
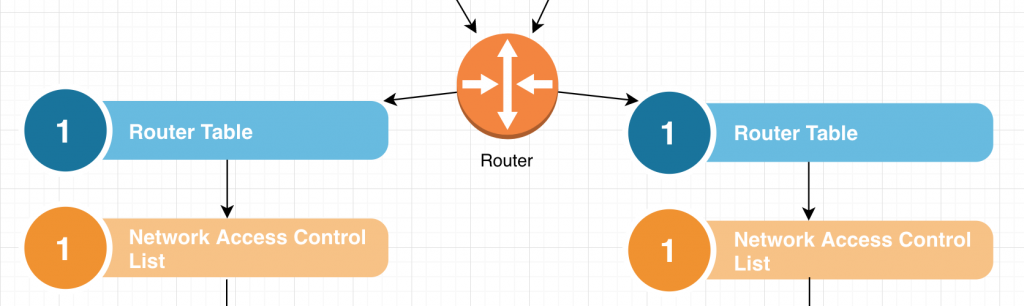
Essentially this whole section is dedicated to figuring out where to send network traffic. Packets hit the Router and are then sent to one or more route tables. In our example we have 2 tables. After reaching a router table rules within the router table then determine the end location for the traffic.
Network Access Control Lists (NACL) at a high level act as a security layer for your network. I’ll cover them in a lot more detail in a later post where I compare them to security groups. But for now this level of understanding is all you need.
Finally we have our subnets. You can see there’s an IP range attached to this subnet, just like there is one for the VPC itself. So this subnet contains a subset of those IP’s defined for this VPC.
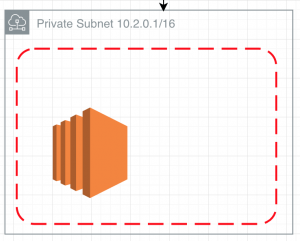
Within that is a red dashed line which denotes the a security group that controls access to the services within the subnet, such as this EC2 instance. Security groups can control port access to incoming and outgoing traffic.
Few…
That wasn’t so hard now it was broken down into smaller chunks it becomes a lot less intimidating.
What is CIDR notation & IP ranges?
I touched up on this when I was breaking down the VPC diagram above. CIDR IP address ranges are basically a way of specifying a range of IP addresses for your VPC to be allocated.
CIDR itself is a universal standard that AWS has adopted for defining IP ranges and it is used throughout the industry. Honestly, up until this point I had never heard of it, but that’s probably because I’m a software developer and don’t venture into networking too often.
Wikipedia give a pretty comprehensive explanation of how to specify CIDR address ranges if your really curious about them. But it’s unlikely to be covered in any great depth during the exams. Check it here. Lastly I found calculating the number of available IP’s a little tricky at first. So I found an online calculator that made things much clearer called IP address guide.
A quick example:
A CIDR of 10.0.0.0/16 will give 65536 IP address
A CIDR of 10.0.0.0/24 will give 256 IP address
AWS allows for 3 specific ranges of IPs to use with VPCs and Subnets. I’ve listed them below. You can learn more about IP ranges in relation to AWS on their VPC and Subnet page.
0.0.0.0 – 10.255.255.255 (10/8 prefix)
172.16.0.0 – 172.31.255.255 (172.16/12 prefix)
192.168.0.0 – 192.168.255.255 (192.168/16 prefix)
Tips for the Exam
We touched up on security groups earlier (something we’ll go into much more detail in a later post) One thing to note about them that isn’t so obvious from the diagram above is that they can span multiple availability zones.
VPCs are region specific and there is a “limit” on the number of VPC’s you can have per region. That limit is 5. However you can easily increase that limit simply by contacting AWS support and requesting the limit be increased.
You can not specify multiple internet gateways per VPC. You get only 1 per VPC. This shouldn’t be an issue as they are highly available and if one were to fail then another availability zone would take over.
A concept that is important to get your head around early on is that a subnet does not span multiple availability zones. This basically means that the hardware that the subnet lives on is all roughly in the same place. I suspect this is for performance reasons but you don’t really have to understand why, just that this is a restriction on subnets.
The default VPC that gets created when you account is setup has subnets associated with it. However they all have internet exposure. None of them are private. This is to make setting up AWS resources simpler initially.
Lastly, Network Area Control Lists or NACLs for short let you block specific IP address and allow others for your VPC and subnets. This gives a much greater level of control.
How do I talk to my private subnet? VPC peering explained
If you’re paying attention, then you might be asking yourself. If my private subnet has not internet access then exactly how do I access the instances inside it?
Good question!
To answer this we need to adopt a technique known as VPC peering.
This allows one VPC to communicate with another VPC. This achieved with something called a direct network route and a private IP address. Once done, your VPC’s will behave as if they are on the exact same network.
Not only that, but you can even connect with Virtual Private Clouds on other AWS accounts entirely!
However one limitation of this is you can’t daisy chain connections. I.e. one VPC peers another and then that one peers yet another VPC. This is not a possibility. You much directly connect from one VPC to another. This is sometimes referred to as Transitive Peering.
Difference between default VPC and custom VPC
I mentioned earlier that when you set up a new AWS account a default VPC is created. All your provisioned instances will be assigned to this VPC automatically. It’s this way to make initial setup easier to do.
However there are some subtle differences between the default VPC and custom VPC’s that you should be aware of:
All subnets that reside in the default VPC have open access to the internet. This is again partly due to easing the setup process for new users.
In addition there are no private subnets in the default VPC. So if you see questions around private subnets in the default VPC then you can discount them quickly.
Following on from this, if you were to create an EC2 instance in a private subnet then you would not receive a public IP address for it. Only a private one.
Conclusion
This has been a very brief look into what a VPC is.
You’ve learnt that:
- VPCs are virtual data centers in the cloud, hosted on AWS.
- They allow for a much greater level of control on how to build your software architecture.
- You get increased levels of security options by specifying public and private subnets. For instance you can put your databases in a private subnet.
- And you learned about CIDR IP address ranges.
Don’t worry if you have lots of unanswered questions. I’m writing several more articles on VPC and its features following this one to go into more detail.
What’s next?
Ok let’s drop the theory for a minute and go ahead and create our own VPC from scratch!
Building a Virtual Private Cloud in 10 minutes