

Why AWS LightSail?
So, when it comes to WordPress, you’re spoilt for choice in terms of hosting solutions. WordPress.com, Bluehost, Host Gator, SiteGround, I can even name several ways to host a site in AWS itself (ec2, containers etc…). So why chose LightSail above the competition and what does it have to offer that alternative solutions don’t? In this LightSail WordPress guide I’ve broken down a few categories you may want to consider when picking LightSail to host your WordPress site and added some helpful tips on how set up things like custom domains, static IPs and SSL encryption to your site.
Lets dive in.
Price
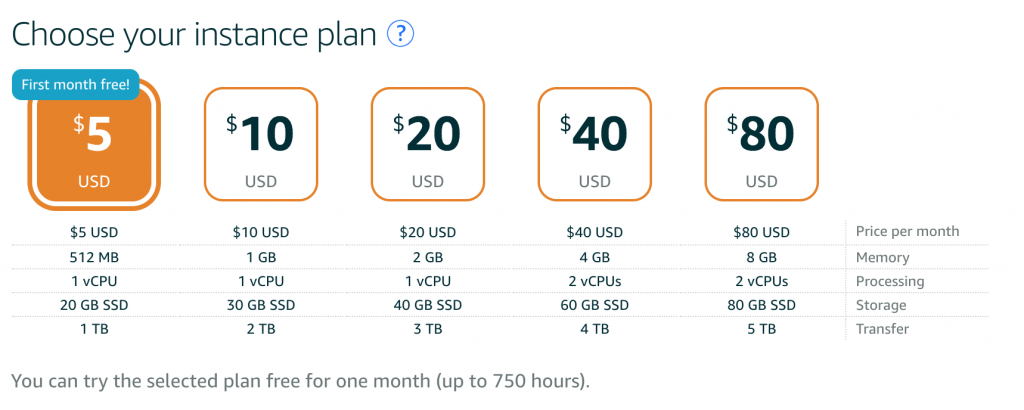
The base cost for hosting a WordPress site on LightSail is $5 dollars a month. With the first month being offered for free, this brings your 12-month total cost of ownership comes to roughly $4.58 per month. That brings it in a pretty competitive comparison to the cheapest of hosting solutions. And cheaper than about half the cost of a ec2 based solution running on a t2.micro.
Simplified User Interface
LightSail takes the approach dramatically simplifying the way you interact with your WordPress instance. By presenting you with an easily to understand custom user interface for handling all the operations you would typically need when managing your WordPress instance. Providing features such as taking snapshots, SSH access with a single click, snapshot utilities, simplified access to load balancing, server metrics and the ability to add resources behind a load balancer as demand on your site grows.
I prefer this approach when compared to ec2. With ec2 there’s a lot of noise in the form of features that are important for maintaining VM’s but when all you are concerned about is running a single WordPress instance then these can act as a distraction.
Setup Time
Your site is up and running in minutes. From what I could tell, far quicker than spinning up the equivalent ec2 instance with a WordPress AMI. I suspect this is because LightSail has a bunch of prewarmed pre-configured instances that it can fire up on demand.
The steps themselves to create a WordPress are really straightforward:
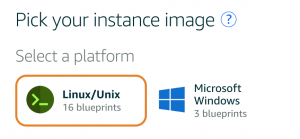
Select your OS. Linus or Windows, unless you have a good reason for using a windows instance then your best bet is to select Linux. Plus, the Linux instance has a cheaper monthly cost.
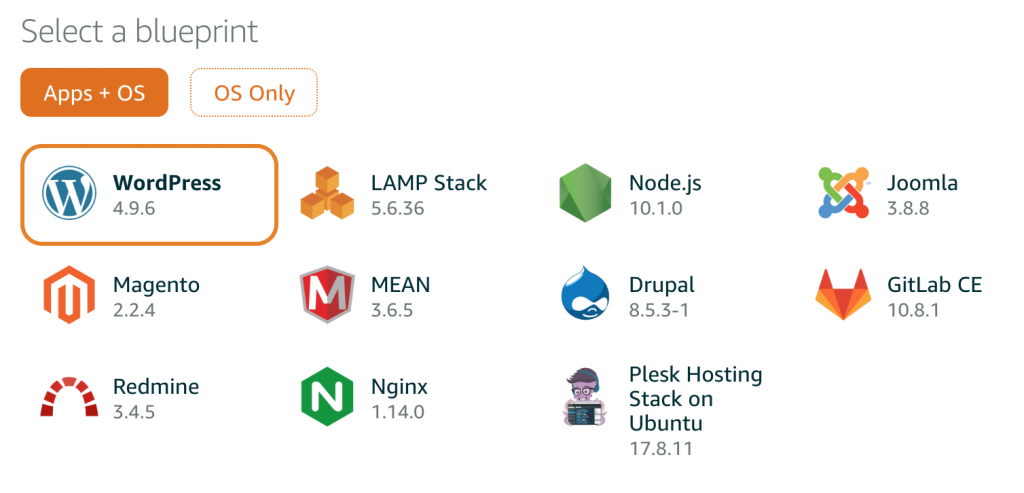
LightSail supports a number of preconfigured instance types. We’re interested in WordPress so pick WordPress.
Instance size. Even a modest instance can support a decent amount of web traffic (provided it doesn’t come all at once, that is) so pick the base plan and get your first month’s costs for free.
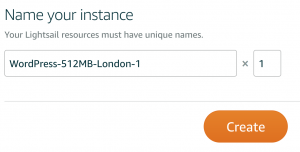
Give it a meaningful name and hit create, you’re done!
Static IP
Restart your instance and your IP resets, this is true if you’re running an ec2 instance or a LightSail instance. This sucks if you’ve got a domain name pointing to your instance. Thankfully LightSail makes it straight forward to set a static IP. I recommend doing this as soon as your instance.
The process by comparison for assigning a static IP for an ec2 instance. You’d have to create the Elastic IP & then assign it to your instance.
Connecting to your WordPress Instance
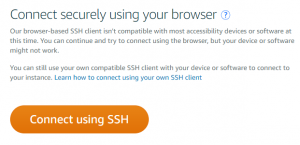
LightSail makes it as simple as a single click to SSH into your instance. You don’t need to open a terminal or command prompt. Simply click the connect button and you’re in!
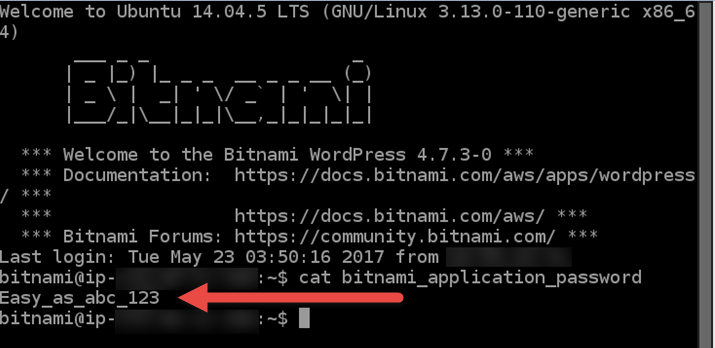
At this point if you’ve created you instance, then you probably want to log in and to do that you’ll need the default generated password. To do this:
SSH into the WordPress instance
Type the following command
cat bitnami_application_passwordHighlight the password and click the copy button in the virtual terminal
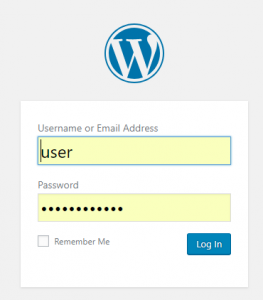
Log into the WordPress instance with the default username “user” and the password you captured from the terminal.
Taking snapshots
Backing up your site is an essentially part of maintaining any website. Thankfully LightSail makes this easy to do. On the Snapshots tab you can quickly create a snapshot or view your existing ones.
From a captured snapshot you can create a new instance and continue your site from a known working state.
Preconfigured analytics
Out of the box, you get system monitoring statistics on the Metrics tab. Selecting a range between 1h and 2 weeks you can quick and effectively see when spike in traffic occurred or increased demand was put on your instance. Metrics include:
- CPUUtilization
- NetworkIn
- NetworkOut
- StatusCheckFailed
- StatusCheckFailed_Instance
- StatusCheckFailed_System
All of which can be easily toggled on an off, depending on what you are interested in.
Linking a domain name to your site
If you’ve followed the setup static IP (TODO link this to that header) then you’re all set for linking your domain to your WordPress instance. My dns registrar just happens to be route53 but this method should work regardless of what provider you make use of.
Log into your domain provider
Add an ‘A’ record
In the LightSail management interface select the networking tab
Copy and paste the Static IP into the ‘A’ record
Hit save
In might take between a few minutes to a few hours for your domain to point to your WordPress instance. Keep checking in every 10 minutes or so. After it successfully point to your site, then you are set!
Easy to setup load balancer
Ok so let’s say you’ve built the most impressive blog ever and everyone is visiting it. They just can’t wait for your next post. Good for you, that’s great!
What’s not so great is if you site slows down to a crawl due to the increased load. Worse yet if it were to crash all together. While these problems in some ways are a ‘nice to have’ they do pose a real problem, especially if you’re deriving an income from your site.
An in-depth guide to setting up a load balancer can be found in the Light Sail documentation and it outside the scope of this blog post.
Porting over an EC2 WordPress site to LightSail
So, there’s no “import from ec2” button built into LightSail. What I would suggest is to export your entire WordPress site using the import/export plugin that comes as standard with all new WordPress instances and then create a new LightSail instance and then import that same site. Sometimes the most obvious solutions are the best. Then reattach the domain name to point to the LightSail instance.
Deleting your LightSail Instance
Well, you’ve decided that the world doesn’t need another cat blog and you WordPress site must come to an end. LightSail has got you covered. The delete tab lets you remove your site, backups, static IP’s etc… with little effort. The other cats blogs of the world will have to take up the slack.
Setting up HTTPS and SSL
Adding and defaulting your site to use HTTPS as opposed to HTTP is something I would recommend. Not only will it make your site more secure by encrypting communication between client and server via SSL certificates. It also plays a role in Google SEO rankings. So if you want to be the top hit on Google then it makes sense to add HTTPS!
Doing so will require that you’re at least comfortable using a cmd line. You don’t necesirily need to know exactly what the commands mean, as long as you follow the steps correctly. SSL certificates used to be expensive to purchase (you can still purchase SSL certificates from sites like GoDaddy for e-commerce purposes), but the good news now is you can get them for free.
Unfortunately, the AWS certificate manager (at the time of writing this post) doesn’t support LightSail or EC2 for that matter. They only support instances behind a load balancer or cloud front.
Conclusion
I really like LightSail, I think it combination of ease of use and competitive price point make it an enticing option when selecting a hosting service for your WordPress site. If you’re already using AWS then it makes sense to stick with the eco system. I’ve always been a fan of the principal of ‘eat your own dog food’ so using a AWS product to host a site that promotes AWS just makes sense!
That being said, if you are thinking of setting up a blog and don’t want to tie yourself into the AWS world. Then I recommend taking a look at BlueHost. It’s consistently recommended by successful bloggers that I respect. You can find a link to BlueHost and other useful services on the Resources page.