
Snowball
Ok, so in part 1 of our S3 ultimate guide series, we learnt how to upload files to an S3 bucket. That’s all well and good if you have a decent upload speed and you only want to put relatively small amounts of data on to S3 (when I say small I’m thinking gigabytes). What happens when you want to backup or migrate massive amounts of data. I’m talking terabytes of data. For situations like this, even with the fastest of internet connections it would take months if not years to push your content to S3.
But don’t worry, Amazon have you covered in the scenario. When you are talking terabytes, you can request Amazon send you a snowball.
What’s a snowball you ask?

Snowballs in the AWS world are essentially high capacity portable hard drives. You can request one through the AWS management console and it will be mailed to you through the post. Upon receiving the snowball, you can then upload all your data. Once complete you simply mail it back to Amazon and they’ll plug it into their network and upload it to your bucket.
Snowball Edge
In some situations, you might find yourself needing to perform some computation on your data in some sort of pre-processing stage. Snowball Edge devices are a special kind of snowball that basically acts as a mini scaled down version of AWS itself.
They provide services such as Lambda functions or EC2 applications that allow users to process data in use cases such as image collation, data migration, machine learning or IoT sensor stream capture.
Snowmobile
Ok, so an internet connection has you covered if you want to upload megabytes and gigabytes of data.
A Snowball has you covered if you want to upload terabytes of data.
But what if you want to upload PETABYTES of data?!
Introducing, the AWS Snowmobile.
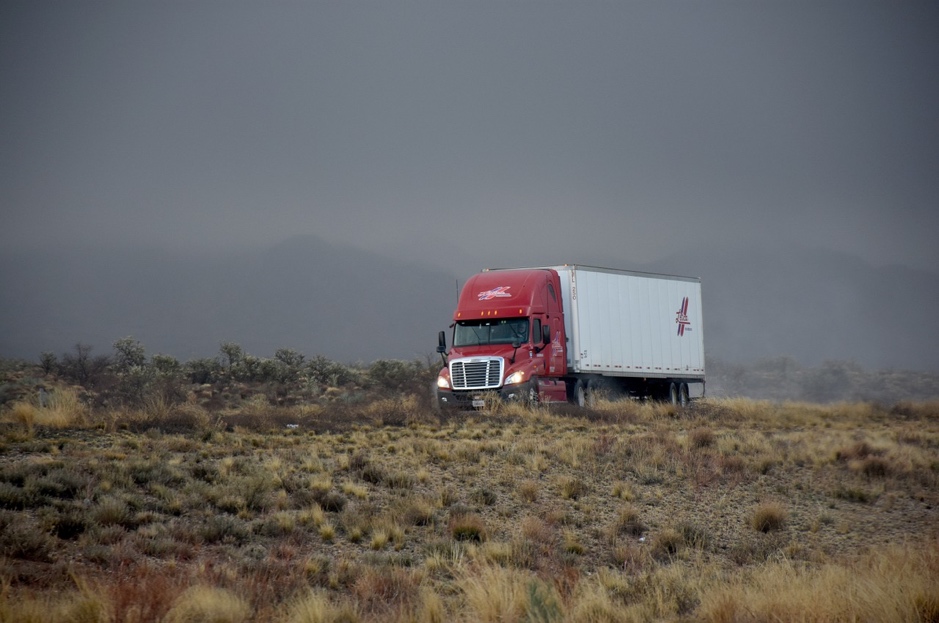
What’s that you ask? Well…its erm… a Truck. A giant truck with massive amounts of storage capacity. The process of uploading data is pretty much the same as with a regular snowball only you’ll probably be hooking the snowmobile truck from your companies parking lot!
To the best of my knowledge these are currently only available in the USA and obviously have a hefty charge associated with their use.
For more information on Snowball checkout their AWS page.
Versioning your bucket data
Versioning is a powerful tool for any object storage solution. Having the ability to see previous versions of a file has innumerable potential benefits and use cases. AWS recognised this and provided a robust versioning feature for S3.
But before using it, there is a few things you should consider as you could find yourself in a pickle if you enable it for the wrong types of files.
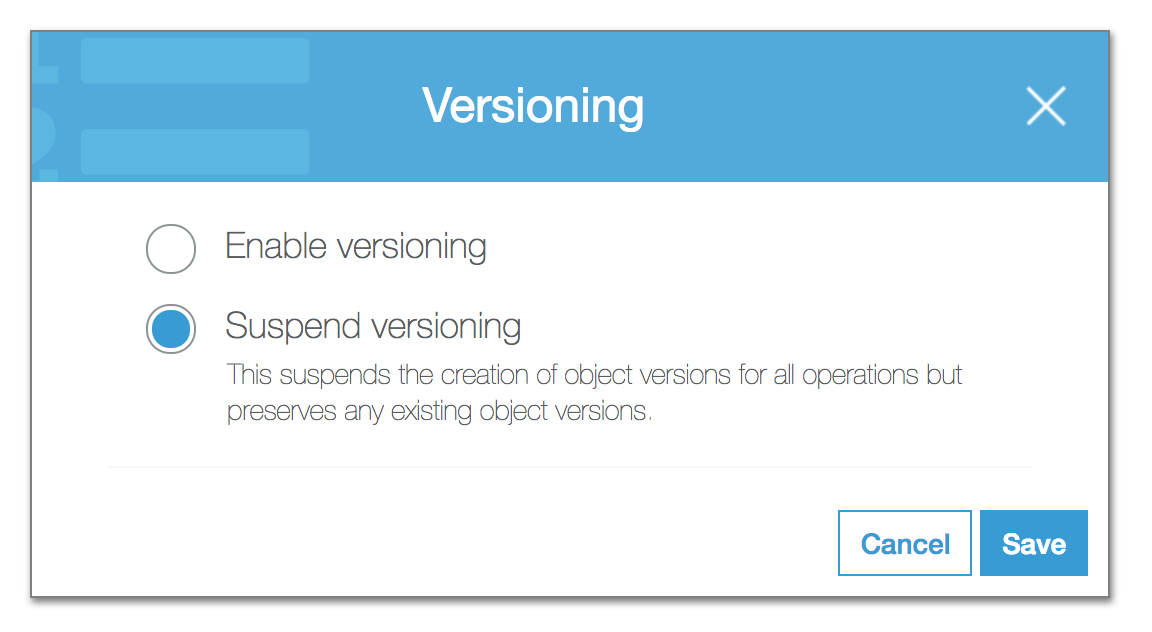
Firstly, once you enable versioning it cannot be disabled. It can only be suspended. So, when you do decide to enable it, you’ll need to factor in if this will affect your bucket later down the line.
Versioning is at bucket level. You cannot enable versioning on a file by file basis. It’s either the entire bucket or nothing! You can work around this of course by moving files you don’t want versioning into another bucket.
So how do you enable versioning?
This is fairly straightforward. Simply enter the bucket on the AWS management console that you want to enable versioning on and select Properties.
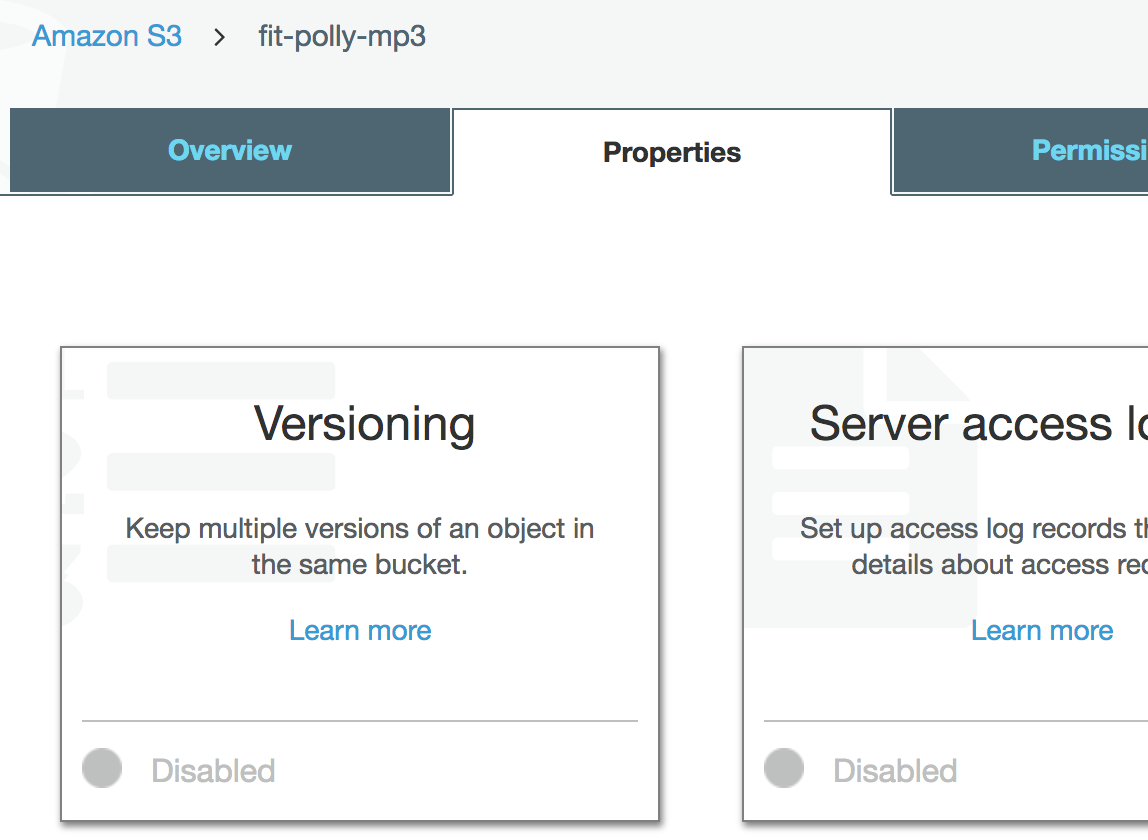
Afterwards, simply click on the Versioning box and you’ll be presented with the option to enable or suspend versioning for this bucket.
As a side note, you can enable versioning on a bucket programmatically of course. Via the S3 SDK or the AWS CLI.
How do I access the versions?
Once versioning is enabled, the S3 user interface updates and a Versions on/off toggle is revealed. It is set to off by default. Selected on will reveal the file versions. Below is a screen capture to illustrate this point.

As you can see, Picture1.png has 2 versions. With the latest one being indicated with “(Latest version)”.
As you can see, in the size column AWS keeps an entirely separate copy of the old version of Picture1.png. As a result, the total storage used is now 190kb. With files this small it’s not much of an issue. However, if you’re uploading files in the gigabyte range then your total used capacity can quickly spike along with your usage charges. It’s worth keeping this in mind when using S3 versioning.
Preventing accidental deletion
S3 has the ability to provide an extra layer of protection when users attempt to delete a bucket or object within a bucket. By enabling MFA (Multi Factor Authentication) to be triggered when a deletion request is made. The user is required to enter a 6-digit code from a pre-authorised device. Check out AWS documentation for an more in-depth explanation.
Integrates with lifecycle rules
Ok this is (in my mind) a cool feature of S3 versioning and goes a step towards addressing the issue raised early in this section to do with enabling versioning on large files.
Essentially S3 versioning now integrates with lifecycle rules and provide you the ability to configure rules that fine what automatically happens to objects stored in your buckets after a specific date or period of time.
For instance, you could set a life cycle rule to move all previous versions of an object to lower cost Glacier storage and then combine that rule with a further rule to delete versions older than 100 days.
Cross region replication
By default, S3 buckets are replicated multiple times (currently 3) within the same region they are stored in. This provides a degree of resilience if say a 1 or even 2 of those availability zones (data centres) were to lose the bucket data through hardware failure.
If, however you wanted to back up your data to an entirely different geographic area then you would have to copy that data to another region. Or in another scenario, if you wanted to replicate data so that regional users could access replicated data with lower latency levels then S3 has a feature called Cross Region Replication.
Setting up cross region replication
There are lots of options when it comes to configuring cross region replication. Covering it in its entirety would warrant an entire blog post for itself (I may write one in the future). For now, I’ll walk you through the basic steps for setting up cross region replication.
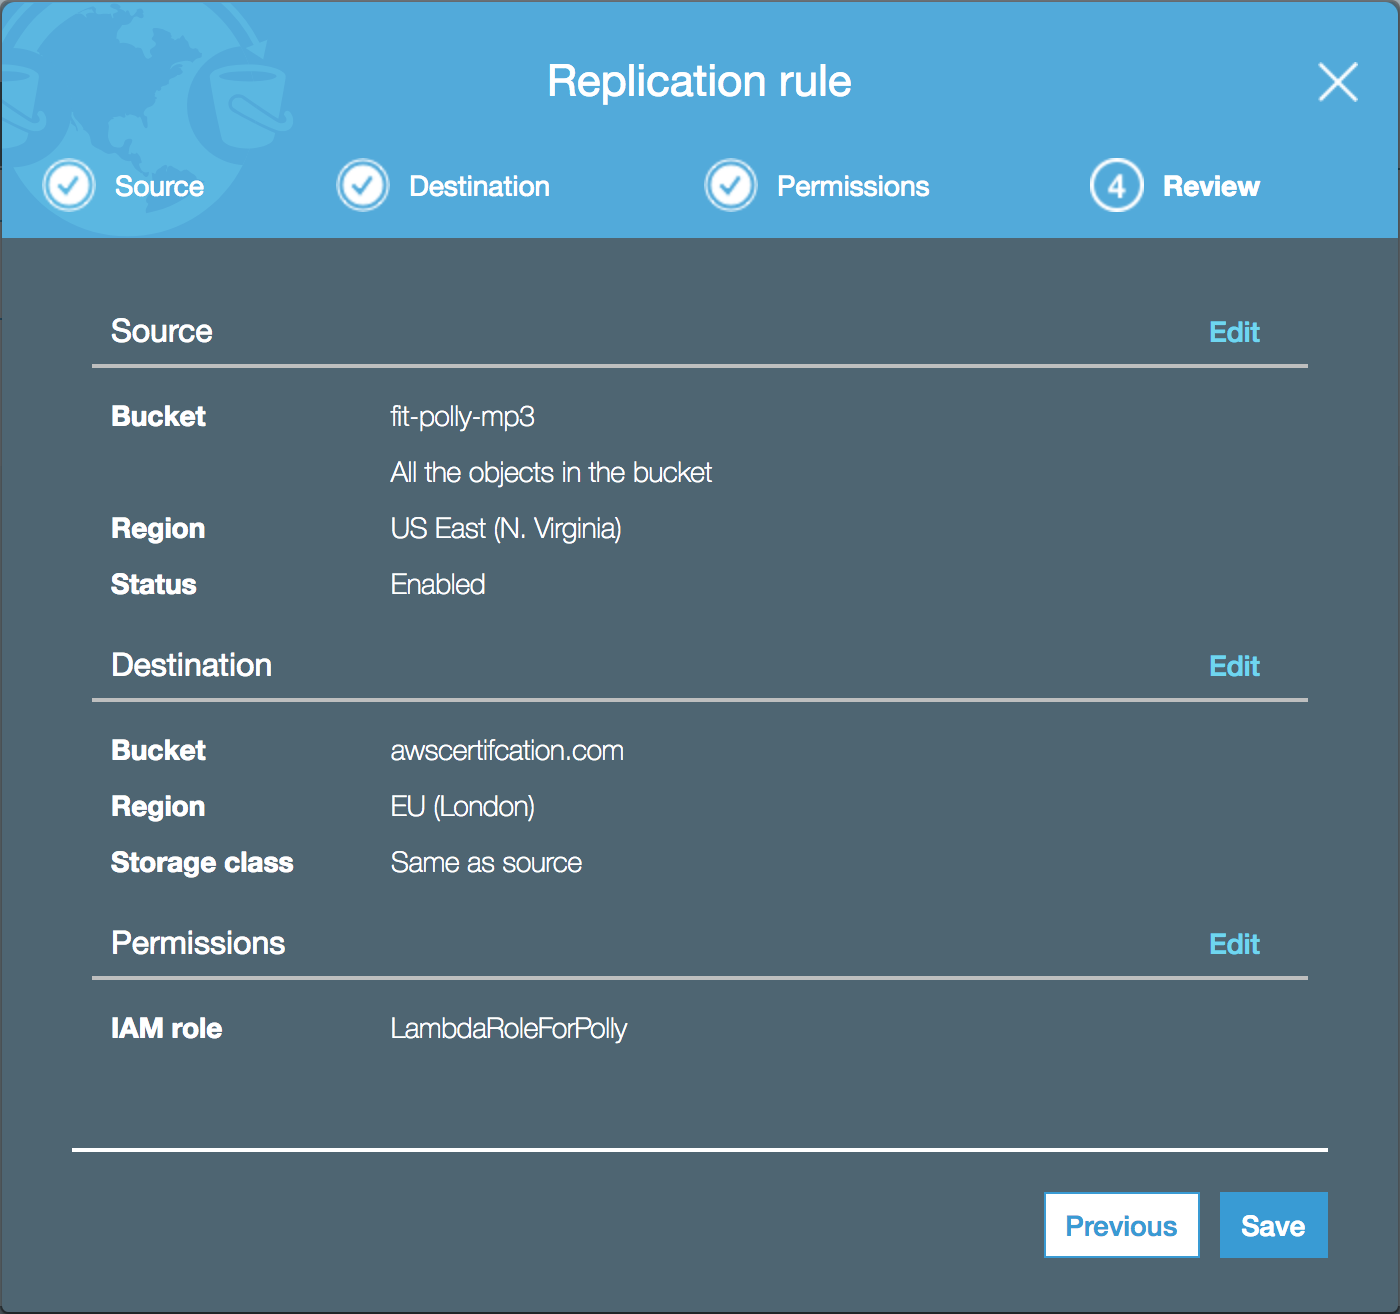
Select a bucket that you want replicated and then select the management tab.
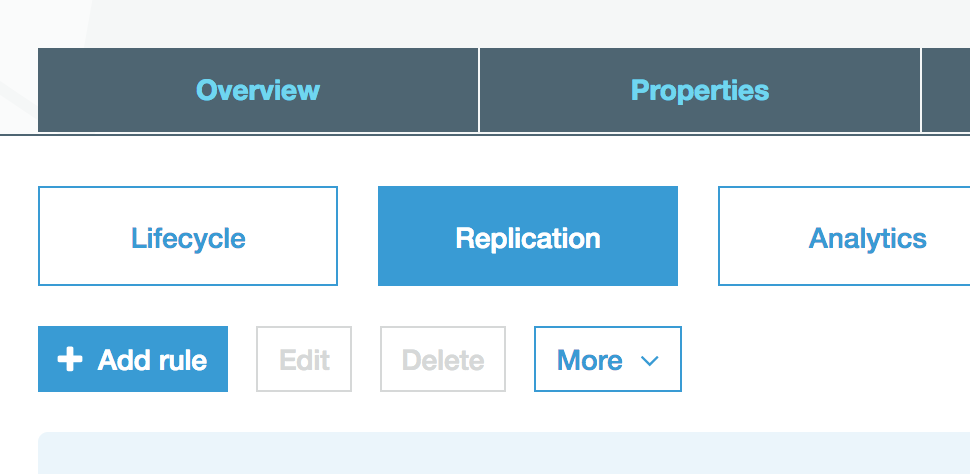
Select the Replication button and click “+ Add rule”.
You are presented with the configuration dialog window. At which point you are invited to select a bucket to enable cross region replication on.
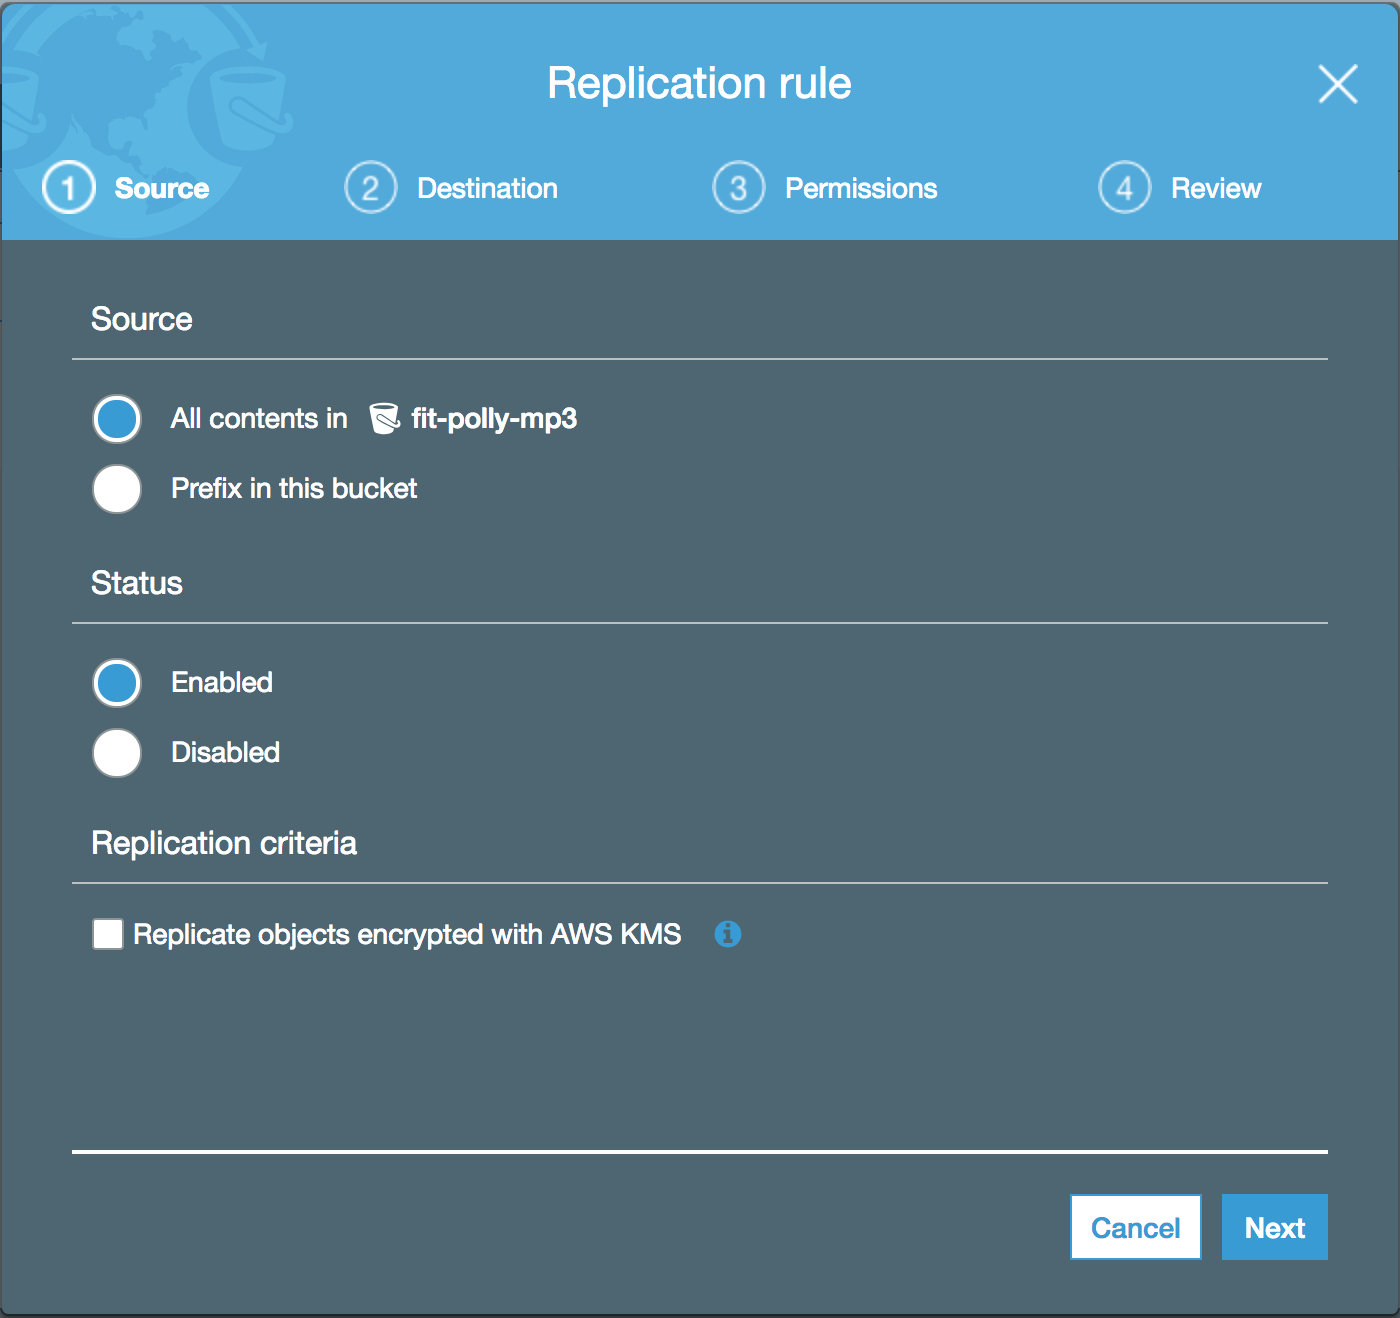
Leave the rest of the options are their default values and click Next, this will take you to the destination step.
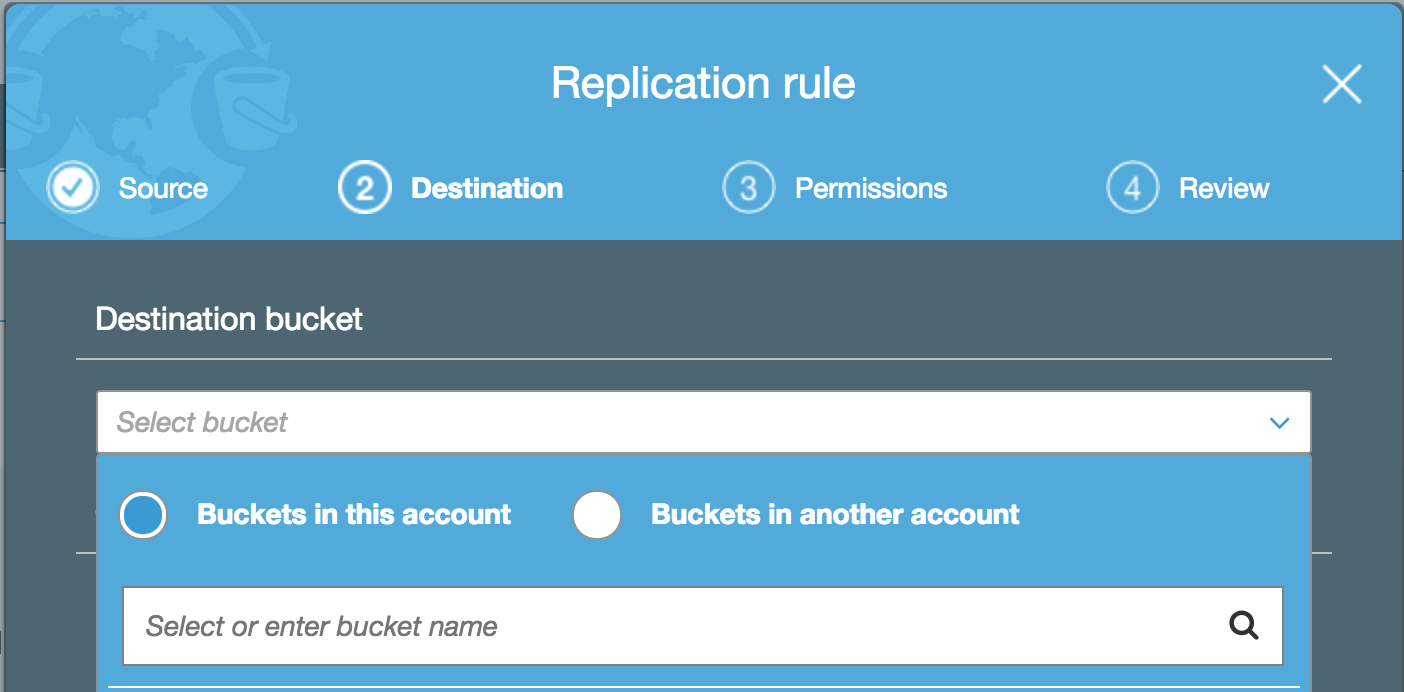
This is where you select the destination bucket for your files to be replicated into. In keeping with our scenario of wanting to add an additional layer of resilience to your data, at this point you would select a bucket you have create in another region from the host bucket.
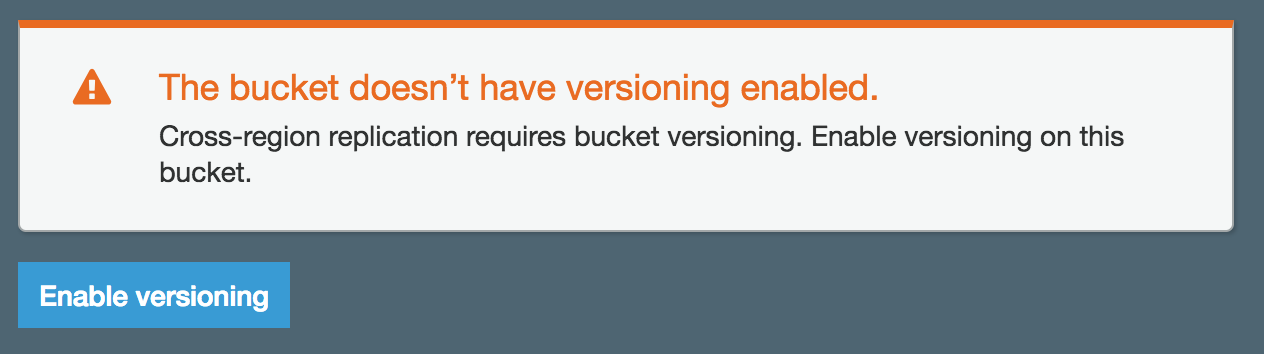
But wait! What’s this? Destination buckets much have versioning enabled in order to make use of cross region replication. This is a restriction of the feature. You can enable it directly from the wizard or you can navigate to the S3 bucket and enable versioning via the properties tab (process described in the Versioning section of this post).
After enabling or selecting a bucket with versioning our next step is to apply some permissions. For instance, rules you have created prior. I.e. permissions for a particular user group to access this bucket etc…
Finally review setup and click Save.
At this point, any file that is written/updated/deleted from the parent bucket is automatically replicated to the allocated bucket. A viola.
That’s it right?
Well…there’s a couple of gotchas you need to look out for.
For instances:
Once only new files will be caught by the cross-region replication. So, if you have a bunch of files in your bucket prior to enabling cross region replication then they won’t be replicated across.
In those scenarios you’ll have to write a recursive AWS cli command to copy them across. If you want an example of one, let me know in the commented below.
Daisy chaining is not allowed. What does this mean? Well you can setup S3 buckets to automatically trigger cross region replication from one bucket to another and then to another etc…I could already see recursive loops spiralling into oblivion if this were enabled and I’m guessing that’s why the AWS team have decided against it.
Finally, when it comes to deletion, there are 2 things to keep in mind.
Delete markers are replicated from bucket to another.
Deleting individual versions or delete markers will not be replicated across to the other bucket. So, you may find yourself with buckets that don’t exactly mirror one another over time.
Encryption
No article on AWS S3 storage would be complete without at least referencing data encryption. S3 gives you a pretty wide variety of options and tries to be and flexible as possible when it comes to encrypting your data.
It can happen server side or client side. With a couple of encryption types to select.
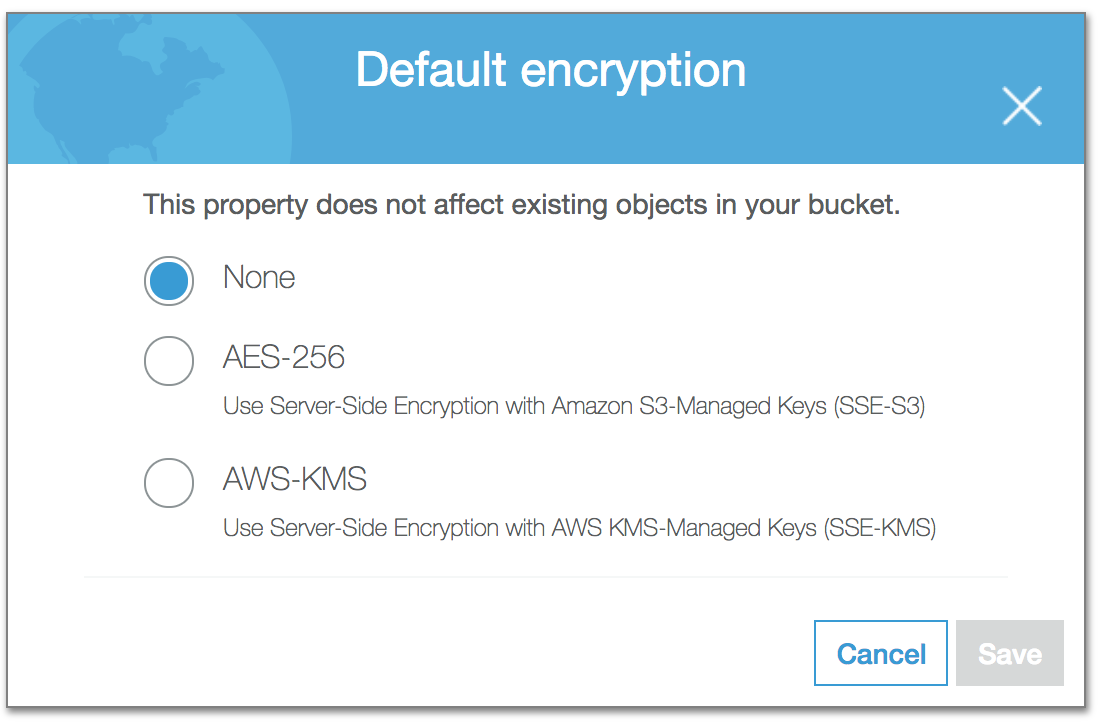
You get 2 options, either you let S3 itself manage your keys with AES-256bit encryption or you use AWS KMS (Key management system) to manage your keys.
The other option is that you encrypt your files prior to uploading them to S3 and manage that encryption and the associated keys yourself. The downside to this, obviously is that if you lose those keys then you cannot decrypt those files.
Policy for accessing buckets
You can assign and create a bucket policy to control who and how users can access your buckets contents. Policies are not limited to S3 buckets and can be applied to other areas of AWS for instance SQS. They are powerful and could warrant a blog post dedicated them alone.
With that in mind, I’m going to quickly give an example of a bucket policy and explain the various aspects of it, just so you get a sense of what they can offer and get you familiar with the syntax.

The syntax is written in JSON and it divided into sections. ID and Version are fairly self-evident. The real meat of the policy is in the Statement section. This is where the policy definition is defined.
The Action section defines what actions are permitted. You can see the actions are split by the service (in this case s3) and the action i.e. GetObject for retrieving objects.
The Effect defines what the user can do in the context of the actions defined above. In this case it is to allow those actions.
The Resource defines the policy relates to. In this case, our bucket.
And finally, the Principal defines the AWS Users that this policy applies to. Incidentally you can use wild cards in this field. * would apply to all users across all AWS accounts!
Extra resources
Still want more? I recommend heading over to AWS’s documentation and checking out the S3 FAQ read before taking the AWS certifications – comes up a lot
There were plenty of things we didn’t address in the article relating to S3. One in particular is to note is that you can allow multiple accounts access to a bucket as well as users i.e. one company might have multiple accounts – dev – test – production etc….
Hosting a website on S3 is possible, I’ve covered this briefly in my LightSail article.
Buckets are private by default and files within the buckets are also private by default
Logging and a bunch more features are available but we would need a part 3 to cover them. Let me know if you’re interested in this and I’ll keep adding to this series.
Conclusion
Wow, now that’s all over with. You’re an expert right?
The trust is, there’s a bunch of things to learn about S3 and we’ve only scratched the surface with these 2 posts. But what should have now, is a decent overview of what Simple Storage Service can offer.
Why would you devote effort and attention to learning it? Well it’s pretty much (along with EC2) at the heart of AWS. A firm grasp of it will pay dividends in the future.
A big massive congratulations, you know more about S3 now than you did 30 minutes ago!